
Last updated November 17, 2026








Free written scope consultation - allowances, timeline, and change-order rules on paper before a single trade is scheduled
Bathroom Remodeling Maintenance Schedule: What to Do and When
Grout sealer applied at 30 days lasts roughly three times longer than sealer applied on day one. That gap is the whole reason this guide exists. Most bathroom remodels in Lancaster get handed over with a walkthrough, a final invoice, and little else, which means the homeowner is left guessing which maintenance tasks actually protect the investment and which are folklore. What follows is the schedule we’d want if we were the ones living with the tile: month-by-month timing tied to how silicone, grout, and cement board actually cure, the manufacturer tasks that keep warranties intact, and the benchmarks worth recording at project close so a future problem reads as data instead of a guess.
Quick Answer
A bathroom remodel needs four maintenance windows: a 30-day cure-and-seal pass (grout and stone sealing, caulk inspection), a 90-day settling review (caulk joints at tub and shower surrounds, drain flow check, hardware torque), a 6-month deep check (grout in wet zones, vent and fan performance), and a 365-day full inspection before your workmanship warranty period closes. Skipping the 30-day and 90-day windows is the single most common reason tile and caulk fail early in Lancaster’s dry, hot climate.
Styles & brands we work with
- Kitchen remodeling
- Bathroom remodeling
- Home additions & ADU
- Roofing
- Windows & doors
- Driveway & pavers
- Fence
Table of Contents
- Why the First 90 Days Decide the Remodel’s Lifespan
- The 30-Day Cure Window: Grout, Stone, and Silicone
- The 90-Day Settling Review: Caulk, Drains, and Hardware
- The 6-Month Deep Check
- The 365-Day Inspection: What to Look For Before Warranty Closes
- Manufacturer Tasks That Keep Warranties Valid
- Reading Caulk Versus Grout: What Failure Actually Looks Like
- Baseline Measurements to Record at Project Close
- The Full Maintenance Table
- Common Mistakes to Avoid
- When to Call a Professional
- Frequently Asked Questions
Why the First 90 Days Decide the Remodel’s Lifespan
Materials don’t arrive at their final dimensions on the day they’re installed. Thinset mortar, grout, silicone caulk, and the framing behind cement board all move as they lose moisture and equalize with the room. In a Lancaster bathroom, that equalization happens against summer afternoons that routinely cross 100 degrees and an indoor relative humidity that can sit under 20 percent for weeks. The materials dry faster here than they do on the coast, which sounds like a good thing until you consider that fast drying is exactly what makes grout shrink and silicone cure with less flexibility than the tube promised.
That’s why the 30- and 90-day windows matter more than anything you’ll do in year three. What happens in those weeks is the material finishing its job. The maintenance tasks in this guide are timed to that settling period, not to a calendar someone copied from a generic checklist.
We’ve seen the results of skipping this schedule. Bathrooms where the homeowner caulked too early and trapped moisture behind a bead that looked sealed but wasn’t. Showers where grout in the wet zone cracked at six months because the sealer went on before the grout had fully hydrated. None of those are installation failures. They’re timing failures, and they’re avoidable.
If you’re still planning the project rather than maintaining a finished one, our Rowan Construction Group Lancaster home page covers how we stage a bathroom remodel from demolition through the final walkthrough, including the documentation we leave behind.
The 30-Day Cure Window: Grout, Stone, and Silicone
Day 30 is the first maintenance appointment that belongs on your calendar, and it’s the one most homeowners skip. This is when cementitious grout has cured fully enough to accept a penetrating sealer, when natural stone (marble, travertine, quartzite) has finished releasing installation moisture, and when you can start inspecting silicone joints for adhesion problems that were invisible on day one.
What to do in this window:
- Seal the grout in wet zones and floors. Use a penetrating sealer rated for the grout type your installer used. Wait the full cure time on the product label before applying, and don’t apply to dry grout in a bathroom that hasn’t run a shower in 24 hours.
- Seal natural stone if you have it. Honed marble and travertine in a Lancaster bathroom absorb hard water minerals fast. A penetrating sealer at 30 days protects the surface and gives you a fail point later: water should bead, not darken the stone.
- Inspect silicone joints without touching them. Look at the caulk lines where the tub meets tile, where the shower pan meets wall tile, and around the toilet base. You’re checking adhesion, not flexibility yet.
- Record your baseline measurements. Water pressure at the showerhead, drain flow rate at both the sink and shower, and the date of the last full shower run. Details on how to measure these are in the benchmarks section below.
- Note the brand names from your spec sheet. Kohler fixtures, Durock cement board, Schluter tile edging systems, and the grout and sealer brands all have specific maintenance requirements. If your contractor didn’t hand over product documentation, ask for it now.
One caution worth stating plainly: silicone caulk applied too early, before the substrate behind it has dried, traps moisture. That moisture shows up as a dark line or a soft spot behind the tile months later. Wait the full cure time the manufacturer specifies, and don’t speed it up with heat.
The 90-Day Settling Review: Caulk, Drains, and Hardware
At 90 days, the bathroom has been through its first full season of use. Tile, framing, and door hardware have all settled into their final positions. This is when you’ll catch the failures that aren’t failures yet: hairline gaps in caulk, a drain that’s slowed by a hair’s width, a shower door that doesn’t close flush anymore. Catching them at 90 days is a five-minute fix. Catching them at year two usually means water behind the tile.
The 90-day tasks break down by category:
- Caulk joints at the tub and shower surround. Run a finger clean along every caulk line and look for separation at the edges, not at the middle. A hairline gap at the top edge of a caulk bead is normal at 90 days and needs a touch-up, not replacement. Full separation from the tile edge needs a contractor.
- Drain flow check. Time how long it takes a full tub to drain. Compare to your day-30 baseline. A drain that’s slowed by even 20 seconds is showing the start of a hair or soap-scum clog.
- Shower door hardware. Check the hinge screws on frameless glass doors. Settling is normal. Loose hinges, though, are the leading cause of glass doors chipping tile when they swing wrong.
- Faucet aerators. Remove and rinse at 90 days. Lancaster’s water has measurable mineral content, and aerators clog faster here than in softer-water markets.
- Toilet base seal. Look at the caulk line around the toilet base for any movement. A rocking toilet at 90 days means the flange seal needs attention before it damages the floor.
If your shower enclosure uses a Schluter system for waterproofing, the 90-day check is also when you verify the drain grate and bonding flange are seated correctly. Schluter’s warranty terms require that the drainage assembly be inspectable and not covered by tile; if your installation doesn’t allow that, note it in your maintenance log.
The 6-Month Deep Check
The 6-month check is the one that matters most for the wet zone. It sits after the first full dry season and into the wetter months, which is when moisture problems show their first visible signs. In the Antelope Valley, the rainfall patterns are mild enough that a leak behind a shower wall can go unnoticed for six months before the drywall on the other side shows a stain.
What to do at 6 months:
- Re-seal grout in the shower and tub surround. Some penetrating sealers last a year. Others, especially on floor grout in high-traffic bathrooms, need reapplication at 6 months. Test by dripping water on the grout line; if it darkens instead of beading, it’s time to reseal.
- Run the exhaust fan and time it. A residential bathroom exhaust fan should clear a mirror fogged by a 5-minute hot shower in under 10 minutes. Time it. If it takes longer, the fan’s blower wheel needs cleaning or the duct is blocked.
- Check the tile edges and caulking around the shower niche. Niche corners are the first place water gets behind a wall if the caulk fails. Look for staining, soft grout, or discoloration.
- Inspect the vanity cabinet and toe kick for swelling. Cabinet panels made of MDF or particle board swell when they get wet. A soft spot at the bottom of the vanity is a leak signal, usually from the sink drain or the supply line.
- Clean the exhaust fan grille and check the flap. A stuck backdraft flap lets humid air sit in the bathroom, which is a slow cause of mildew in the corners.
This is also the point where a Lancaster homeowner should decide whether the original contractor is still reachable. Our standard is that every visit includes a documented photo record. If your project was done by a contractor who didn’t provide that, at 6 months is the right time to start your own record going forward.
The 365-Day Inspection: What to Look For Before Warranty Closes
Day 365 is your deadline. If the work is covered by a workmanship warranty, whether one year or longer, this inspection is what protects your rights if something needs to be fixed. Do it, document it, and put any concerns in writing before the window closes, not after.
The 365-day inspection list:
- Full photo pass of every wall, floor, and ceiling surface. Photograph caulk lines, grout joints, tile edges, and the base of every fixture. These photos become the reference for every future year.
- Water pressure re-check against the day-30 baseline. A drop of more than 10 percent suggests a blocked aerator, a failing fixture cartridge, or a partially closed valve.
- Drain flow re-check on both sink and shower. Compare timing to the baselines you recorded.
- Wall inspection on the opposite side of the shower wall. Look for any staining, blistering paint, or soft drywall. These are the first visible signals of a failed shower waterproofing system.
- Grout line inspection in all wet zones. Any joint wider than a hairline, any missing grout, any crack that runs from one joint across to another: photograph and report all of them.
- Fixture brand warranty check. Kohler and Toto fixtures carry their own product warranties that run longer than workmanship warranties. Note each fixture’s install date and model number in your maintenance log.
If your bathroom remodel was installed as part of a larger project, like a Home Additions & ADU in Lancaster build, the same 365-day window applies to the bathroom component, and the inspection should run through the plumbing, electrical, and ventilation specifics of the addition as well.
Manufacturer Tasks That Keep Warranties Valid
Product warranties are conditional. Skip the required maintenance and the warranty for that product can be voided, which means a failure that would have been covered becomes your cost. These are the tasks tied to specific brands we install most often in Lancaster bathrooms.
- Kohler fixtures (toilets, faucets, shower valves): Kohler’s warranty terms require that the fixture be installed per the specification sheet and that the aerator and cartridge receive periodic cleaning. A seized cartridge from hard water is a maintenance issue, not a warranty issue. Clean the aerator at 90 days and every 6 months afterward; descale the showerhead with vinegar on the same schedule.
- Schluter tile edging and waterproofing: Schluter’s warranty requires that the waterproofing membrane and drain bonding flange remain accessible for inspection. Do not tile or seal over any part of a Schluter drain assembly that the specification sheet says stays inspectable. If you can’t see the drain grate edges, photograph that and note it in your log.
- Durock cement board: Cement board itself doesn’t require maintenance, but the waterproofing system over it does. If the caulk and grout at Durock seams fail, water reaches the board, and the warranty pathway on any related waterproofing product is compromised. Reseal grout at 6 months in wet zones to stay compliant.
- Grout and sealer products: Every grout brand specifies a cure time before sealing, typically 7 to 14 days, and a reapplication interval, typically 6 to 12 months. Sealing outside those windows can void the sealer warranty. Follow the product documentation, not a generic schedule.
- Exhaust fans (Panasonic, Broan): Fan warranties generally require that the grille and blower wheel receive periodic cleaning. A seized blower from dust buildup is a maintenance failure, not a defect.
If your contractor didn’t hand over the product documentation binder at project close, this is worth asking for. A written spec sheet, a photo record from installation, and the manufacturer’s maintenance sheet are what “documented handoff” means in practice.
Reading Caulk Versus Grout: What Failure Actually Looks Like
Most homeowners look at a caulk line and see a caulk line. The difference between a hairline gap and full separation matters, because one you can fix with a caulk gun and the other needs a trained eye on the substrate behind it.
Hairline gap in caulk: A gap no wider than a hair, at the edge where the caulk meets tile, usually under a millimeter. Cause is normal movement. Fix: clean the surface, apply a thin bead of 100% silicone caulk matched to the surrounding tile grout color, tool smooth, cure per the tube.
Full separation in caulk: The bead has detached from the tile edge entirely, or from the tub surface, or both. You can see the substrate. Cause is either a substrate problem (moisture behind the tile), an age problem (the caulk is past its service life), or a compatibility problem (wrong caulk type used originally). Fix: this is a contractor call. Do not simply caulk over it. If moisture is behind the joint, a new caulk bead traps it.
Hairline crack in grout: A crack narrower than a credit card edge, running along a single joint. Cause is normal cure shrinkage. Fix: fill with matching grout or a grout colorant, then reseal after the recommended cure.
Full separation in grout: Missing grout at a joint, or a crack that runs across a joint and continues into the adjacent tile field. Cause is usually substrate movement or a failed thinset bond. Fix: contractor.
A practical rule: if the joint is above the water line and the gap is hairline, you can handle it. If the joint is in the wet zone (shower floor, tub surround, shower niche), any separation beyond a hairline deserves a professional look. Silicone caulk and grout are the two most misused materials in a bathroom, and both are easy to make worse.
Baseline Measurements to Record at Project Close
The measurement habit separates maintenance from guesswork. If you don’t know what “normal” looked like on day 30, you can’t tell whether the shower drain has degraded by year two or whether it was always slow. Record the following at project close or at your 30-day check, on a single page, and revisit it at every review.
- Water pressure at the showerhead. Use an inexpensive inline pressure gauge at the shower arm. Note the reading in PSI.
- Water pressure at the sink faucet. Same gauge at the aerator. Note in PSI.
- Shower drain flow rate. Time (in seconds) how long a full tub takes to drain, or use the sink and a measured quart.
- Sink drain flow rate. Same measure. A drop of more than 20 percent from baseline signals a clog forming.
- Exhaust fan clearing time. Time how long the fan takes to clear a mirror fogged by a 5-minute hot shower. Note in minutes.
- Fixture model numbers. Off the spec sheet: each Kohler, Toto, or other fixture’s model and installation date.
- Grout and caulk brand, color, and application dates. For every reseal or touch-up going forward.
- Photo record. Every wall, floor, ceiling, and end of every joint. Date-stamp them.
This is the documentation a contractor should hand you at project close but rarely does. Under the Haven Standard, our standard at Rowan Construction Group, every visit includes a documented photo record and every project hands off with a written scope and warranty. That’s the baseline a homeowner should expect, not an upsell.
If you’re planning exterior work alongside your bathroom maintenance, our pages on Driveway & Pavers in Lancaster and Fence Installation in Lancaster cover the same documentation approach for those trades.
The Full Maintenance Table
This is the schedule in one view. Print it, or copy it into a note on your phone. Every task here is one you can do yourself, or one to verify with a contractor at the next visit.
- 30 days – Seal grout in wet zones and floors. Tool: penetrating sealer, small foam applicator, clean rag. Time: 60-90 minutes including dry time.
- 30 days – Seal natural stone (if applicable). Tool: stone-specific penetrating sealer, applicator. Time: 45-60 minutes.
- 30 days – Inspect silicone joints (adhesion only). Tool: eyes and a flashlight. Time: 10 minutes.
- 30 days – Record baseline measurements. Tool: pressure gauge, stopwatch, notebook. Time: 20 minutes.
- 90 days – Caulk joint touch-ups if hairline gaps appear. Tool: 100% silicone caulk, caulk gun, tooling tool. Time: 20-30 minutes per joint.
- 90 days – Drain flow re-check against baseline. Tool: stopwatch, notebook. Time: 15 minutes.
- 90 days – Rinse faucet aerators. Tool: small wrench, bowl. Time: 10 minutes.
- 90 days – Check shower door hinge screws. Tool: screwdriver. Time: 5 minutes.
- 6 months – Re-seal shower floor and surround grout. Tool: penetrating sealer, applicator, rag. Time: 60-90 minutes.
- 6 months – Clean exhaust fan blower wheel and grille. Tool: vacuum, soft brush. Time: 20 minutes.
- 6 months – Inspect shower niche and corners for staining. Tool: flashlight. Time: 5 minutes.
- 6 months – Check vanity cabinet base for swelling. Tool: visual, hands. Time: 5 minutes.
- 12 months – Full 365-day inspection with photo record. Tool: camera, notebook, flashlight. Time: 30-45 minutes.
- 12 months – Wall check on opposite side of shower. Tool: visual only. Time: 5 minutes.
- 12 months – Compare all benchmarks to day-30 baseline. Tool: notebook. Time: 10 minutes.
- Annually – Reseal grout in wet zones. Time: 90 minutes, with the same tools as the 6-month task.
Two tasks in that table sit outside the homeowner’s lane: any full separation in a wet-zone caulk joint, and any wall staining on the far side of the shower. Those call for a professional, and they’re worth catching early. Catching a waterproofing failure at 12 months is a repair. Catching it at 24 months is a rebuild.
Common Mistakes to Avoid
- Sealing grout on day one. The grout hasn’t finished curing, and the sealer can trap moisture. Wait the full cure time on the product label, typically 7 to 14 days minimum.
- Caulking over full separation. If the joint has separated from the substrate, new caulk traps the moisture that caused the separation. This is the most common DIY mistake in Lancaster bathrooms.
- Using grout where caulk belongs. The corner joints of tub and shower surrounds need a flexible caulk, not grout. Grout cracks in those corners because the frames move.
- Ignoring the exhaust fan. A bathroom in Lancaster needs working ventilation more than most places because the outdoor air is so dry that outdoor moisture doesn’t help. If the fan isn’t clearing the room, the moisture stays in the walls.
- Skipping the 365-day photo record. Warranty claims without a documented record are hard to make. Photograph the surfaces at 365 days or the warranty protection is hollow.
- Replacing fixtures without checking the model. A generic replacement cartridge doesn’t fit a Kohler valve. Note the model number at project close so future maintenance is a five-minute job, not a fixture replacement.
- Treating a mild smell as normal. A persistent damp smell in a remodeled bathroom usually traces to one of three things: a blocked vent flap, a slow leak behind the tile, or a dried-out p-trap. All are worth investigating within a week.
When to Call a Professional
Some maintenance tasks belong on your calendar, and some belong on a contractor’s schedule. Call a professional if any of these apply: full separation in a caulk joint in the shower or tub surround, any staining on the wall on the far side of the shower, grout loss that exposes the cement board beneath, a shower pan with soft spots or movement underfoot, a toilet that rocks at the base after re-caulking, a drain flow rate that has dropped by more than 20 percent from baseline and stayed down after a hair and soap-scum clearing, or any exhaust fan that stops clearing a fogged mirror in under 10 minutes after cleaning. Each of those signals a condition that a caulk gun won’t fix and that gets more expensive with delay. Rowan Construction Group Lancaster offers free estimates in Lancaster. Call (844) 797-3312 to schedule one. Estimates include a written price, a written scope, and the free second-opinion review on any competitor’s written quote you’d like us to look at.
Frequently Asked Questions
Wait at least 30 days for cementitious grout and follow the sealer manufacturer’s cure time before application, which is typically 7 to 14 days after grout installation. Sealing earlier traps moisture in the grout and shortens the sealer’s life instead of extending it. In Lancaster’s dry, hot climate, grout cures faster than on the coast, but faster cure doesn’t mean earlier seal: the moisture content, not the surface feel, is what matters. Call (844) 797-3312 for a free estimate on a reseal if you’re not sure whether yours was done on schedule.
A hairline gap is a separation no wider than a hair at the edge where caulk meets tile, and it usually needs a touch-up with a fresh silicone bead. Full separation means the caulk has detached entirely from the tile or tub surface and you can see the substrate. Hairline gaps you can fix; full separation needs a contractor to inspect for moisture behind the joint. Applying new caulk over full separation traps the moisture that’s already there.
Reseal shower floor and surround grout every 6 to 12 months depending on traffic and water hardness. Lancaster’s water is moderate in mineral content, so most bathrooms land on an annual reseal with a spot-check at 6 months. Test by dripping water on the grout line: if the water darkens the grout instead of beading, it’s time to reseal. Call (844) 797-3312 to schedule a free estimate if you’d rather have us assess the current sealer condition first.
Our 365-Day Done Right Promise covers the workmanship we performed on your project. It does not extend to maintenance tasks done by the homeowner, or to damage from skipped maintenance like unsealed grout or an over-caulked joint. If you’d like the promise on a maintenance task, we can quote that separately in writing. Estimates are free, and every quote is a flat price with a written scope, no change orders without your signature.
Look for three signs: staining or blistering paint on the wall on the far side of the shower, soft spots or movement underfoot in the shower pan, and grout that has gone dark and stays dark after drying. Any of those suggests moisture has passed the waterproofing system. In Lancaster bathrooms, these signs often appear 18 to 24 months after a failure starts, which is why the 6-month and 365-day photo record is worth keeping. Call (844) 797-3312 for a free estimate on inspection if you’re seeing any of the three.
No, and this is one of the tasks with real consequences. A bathroom exhaust fan that stops clearing a fogged mirror traps moisture in the room, and trapped moisture is the leading cause of mildew and drywall damage around a shower. Clean the blower wheel and grille at 6 months and confirm the backdraft flap opens and closes freely. If the fan still won’t clear the mirror in under 10 minutes after cleaning, the duct or motor likely needs a contractor. Estimates are free at (844) 797-3312.
The Bottom Line
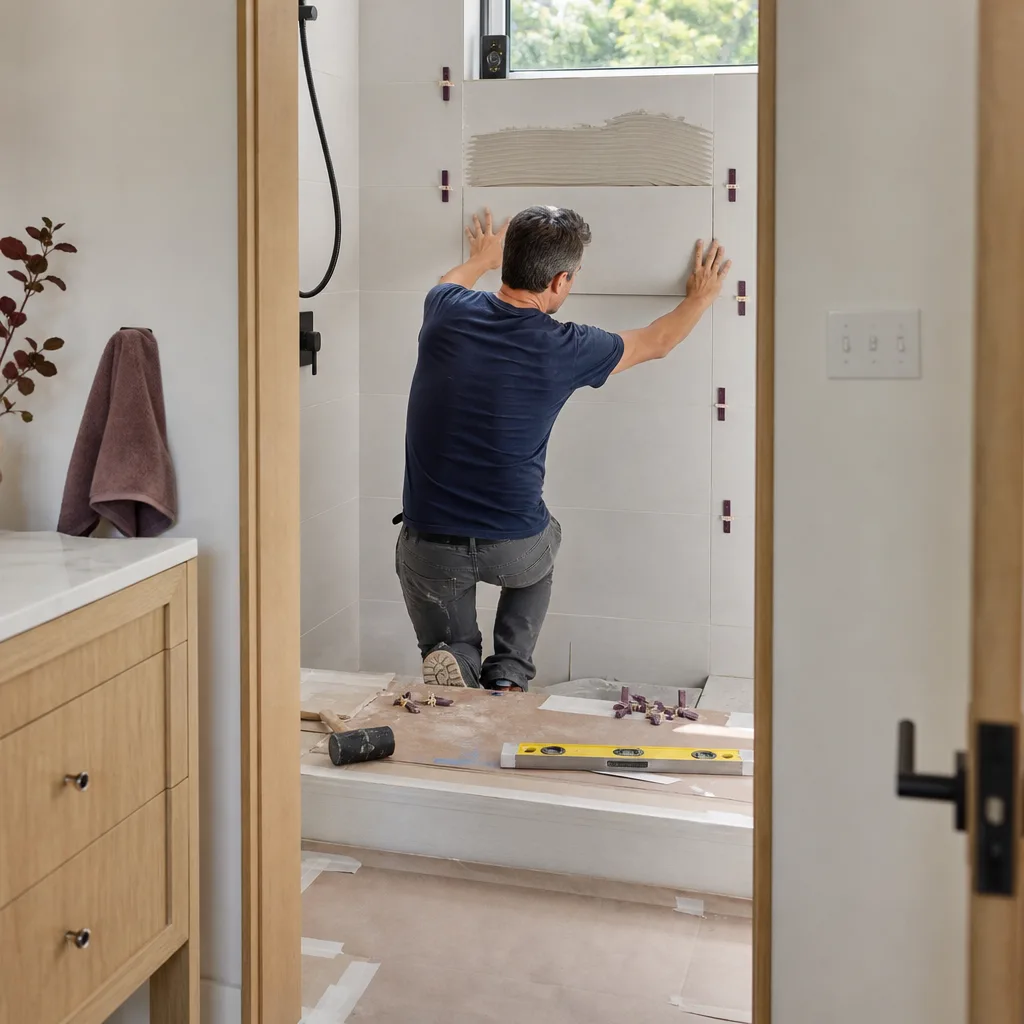
The bathroom remodel you paid for is not finished at the walkthrough. It’s finished at 365 days, when the materials have settled and the workmanship has either held or hasn’t. The four maintenance windows, at 30, 90, 180, and 365 days, do more to protect that investment than any single product choice. Record your baselines at day 30, photograph every surface at day 365, and call a professional for full separation, wet-zone grout loss, or any sign of moisture on the far side of the shower. Everything else is on the calendar, and worth doing.
If you’re planning a Lancaster bathroom remodel or you inherited one from a contractor who didn’t hand over a maintenance schedule, Rowan Construction Group Lancaster offers free estimates and a free second opinion on any written estimate you already have. Every project comes with a flat written price, a signed change order before any change, and The Haven Standard behind it. Call (844) 797-3312 to schedule your free estimate. Our technicians have up to 19 years of experience, and every visit includes a documented photo record as standard.
Written by the team at Rowan Construction Group Lancaster.
See the difference
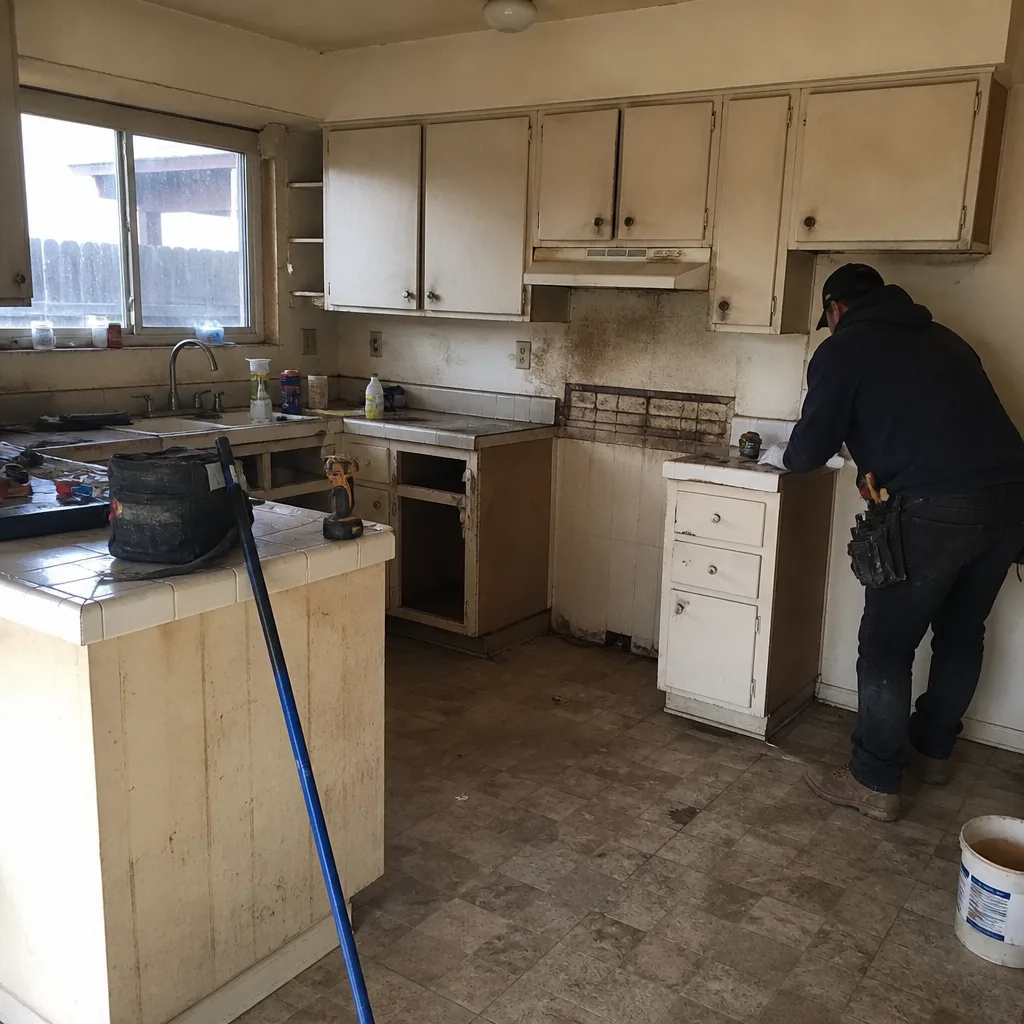 Before
 After
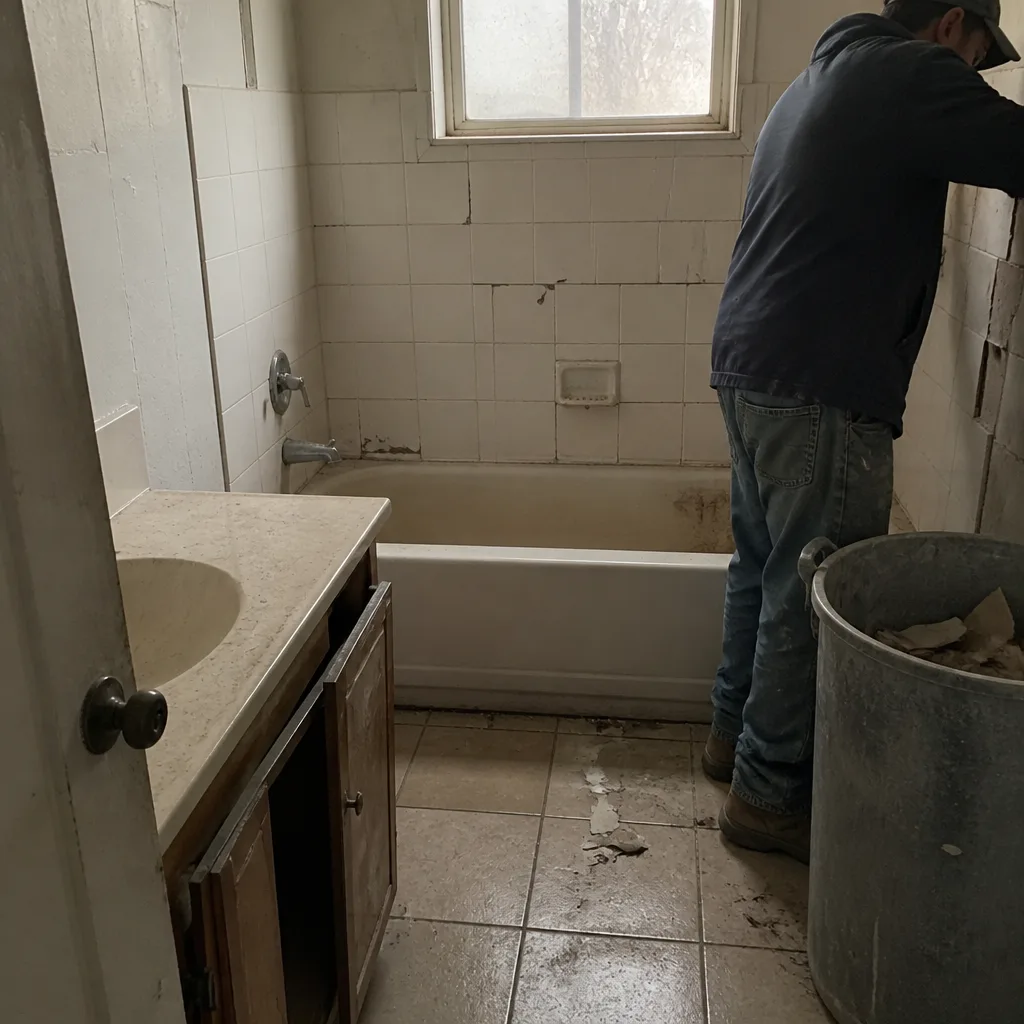 Before
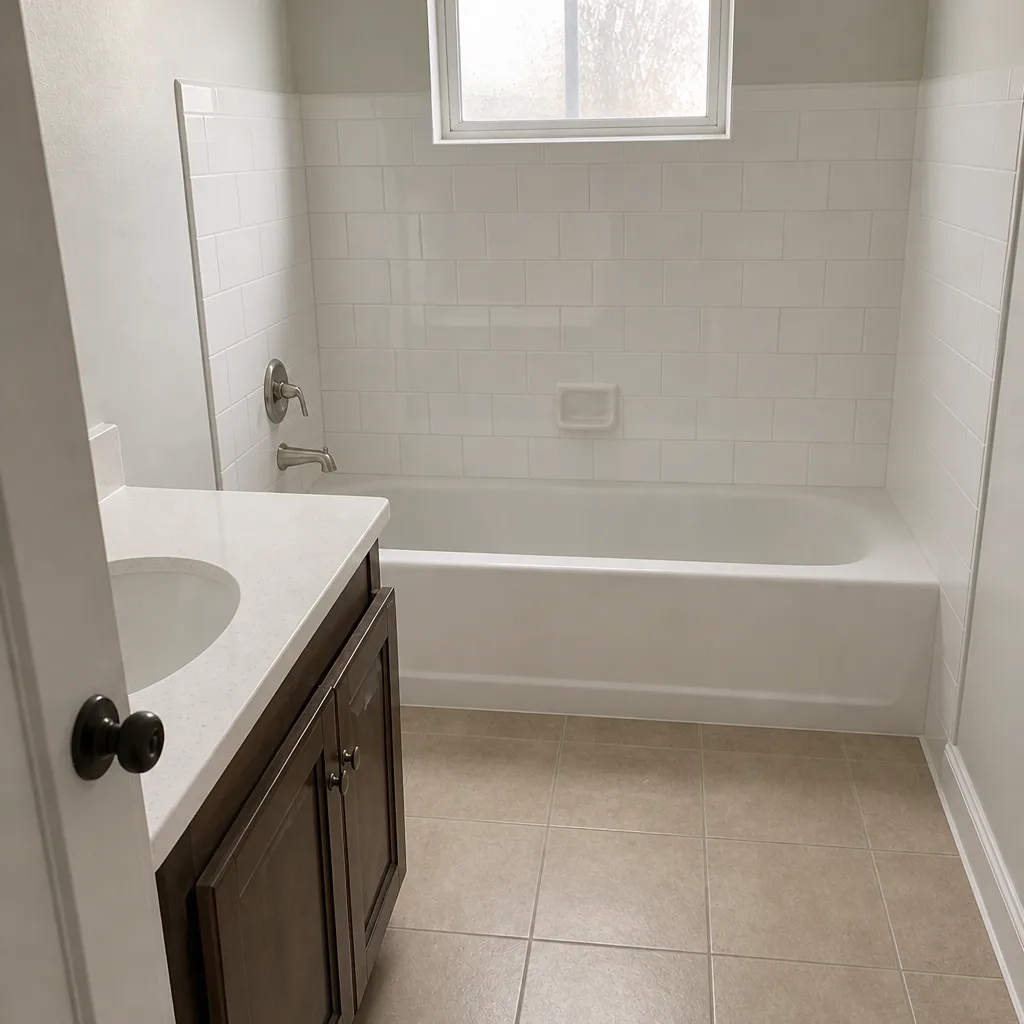 After
 Before
 After